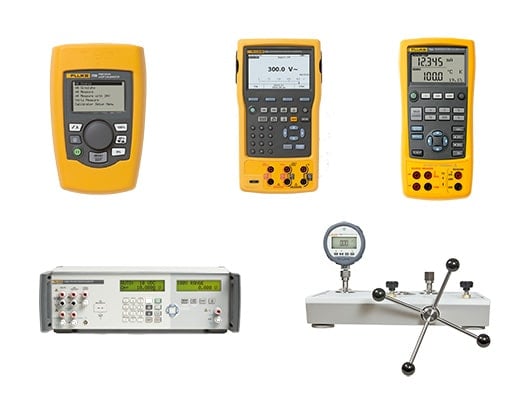
Table of Contents
What is a calibrator?
How is a calibrator used?
Why is calibration important?
When did people start using calibrators?
What are the different types of calibrators?
Who uses calibrators?
How often should a calibrator be used?
How do you automate calibrators?
When should you upgrade an old calibrator?
What is the price range of calibrators?
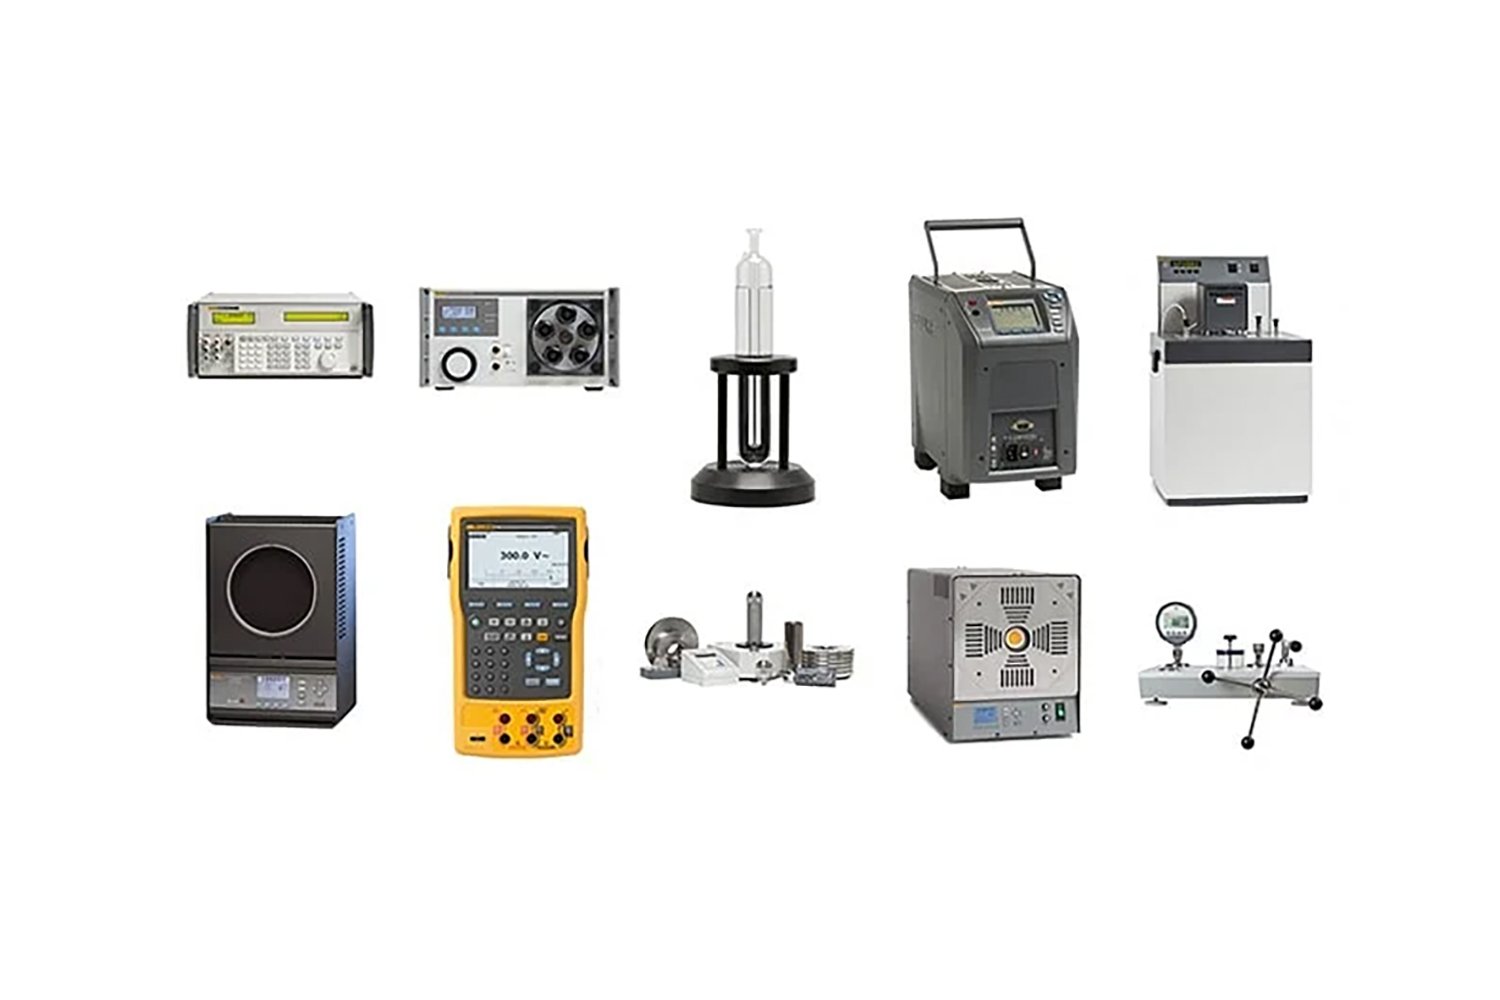
A Variety of Calibrators
What is a calibrator?
A formal and technical definition of “calibrator” is “a measurement standard used in calibration.” This definition comes from the BIPM (Bureau International des Poids et Mesures or International Bureau of Weights and Measures), based in France. BIPM coordinates the worldwide measurement system and works to unify measurements around the world.
To put it another way, a calibrator is an instrument used as a reference (also called a standard), whose measurements are compared with the measurements of another instrument of lesser accuracy (called the device under test). The reason for doing the test is to determine whether the device under test (DUT) is as accurate as it’s supposed to be.
People refer to calibrators in various ways. The following terms are often used as synonyms:
- Calibration equipment
- Calibration instrument
- Equipment calibrator
- Instrument calibrator
- Calibration device
- Calibration tool
Sometimes an instrument like a digital multimeter is used as a calibrator, but the functionality is the same – comparing the measurements of a more accurate instrument with those of a less accurate instrument.
The accuracy ratio is typically four-to-one (4:1). That is, best practices state that the calibrator should be at least four times more accurate than the device under test.
How is a calibrator used?
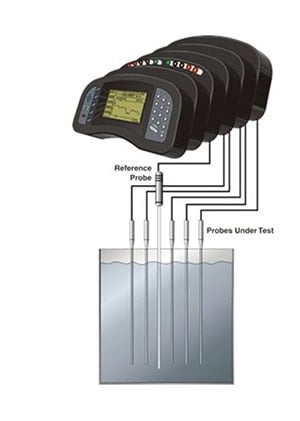
A calibrator is used to confirm whether a device under test (DUT) is operating within the measurement range specified by its manufacturer.
The image to the right illustrates the readout method for calibrating thermometers. A calibrated reference probe and probes under test or DUTs are submerged into a liquid at stable temperature. The temperature reading of the calibrated probe is compared to the readings of the probes under test.
General steps for using a calibrator:
- Make a measurement with the instrument.
- Make the same measurement with the DUT.
- Evaluate the uncertainty of the measurement process.
- Calculate the difference between the measurements. This will tell you the measurement error between the calibrator and the DUT.
- Record the measurements and the results.
- Continue these steps for as many measurement points as required by the calibration procedure.
- When you have completed making the measurements and comparing them you can verify if the DUT error is less than the product specifications (in-tolerance) or not. If it isn’t, you’ll need to decide whether the DUT can be repaired or adjusted, and then re-calibrated to confirm that it performs within specification.
If a calibrator is used as a source (rather than as a measuring device), the process would be similar, but you would connect the DUT to the calibrator and send a known quantity (for example, 10 Volts in the case of an electrical calibrator or 100°C in the case of a temperature calibrator) from the calibrator to the DUT. You know how accurate the calibrator’s source signal is, and therefore can look at how the signal appears on the DUT and calculate whether the DUT is within its specification.
Why is calibration important?
Let’s look at an example from daily life. Suppose you want to buy a pound of hamburger. Whether you decide to make the purchase at the supermarket near your job or at the corner store near your home, you feel reasonably certain that you’ll be getting an actual pound of hamburger no matter where you buy it. That’s because you know that somebody at each store weighed the meat before it was packaged.
What you might not be wondering is, how do we know that each store’s scale is accurate? The simple reason is that the scales were calibrated – the scales were each compared with a more accurate weight measuring device.
But let’s go a step further. How do we know that the calibrator is accurate? The answer is that it was compared with another reference that is even more accurate. That one was, once again, compared with a more accurate reference, and so on, up until the ultimate definition of accuracy – in this case, weight – which is the kilogram.
The process of tracking the accuracy of measurements from the lowest to the highest level is called traceability, and it’s the process that enables measurements to be performed uniformly around the globe. It is also important to understand the quality of each comparison, which is communicated by the measurement uncertainty of each comparison. Without measurement uncertainty, measurement traceability does not exist.
Uniform measurements are important because not only do you want to trust that you’re getting that pound of hamburger, you also want to trust that the nuts and bolts that hold bridges together have the proper metallurgical composition and are the correct size, or that the electronics in your cell phone perform the way they should.
On a larger level, measurement uniformity makes global trade possible. Calibration helps to ensure correct and uniform measurements and that is why calibration is important. Learn more about the importance of calibration.
When did people start using calibrators?
People have been using calibration instruments since the beginning of recorded history, although older ones were much more rudimentary. One of the earliest standards for length, for example, was a body part, specifically the length of an Egyptian emperor’s forearm between his elbow and the tip of his middle finger. Bars of this length, called cubits, were made and used to construct the pyramids. (As an interesting side note, the workers were required to bring their cubits back for calibration at every full moon. Failure to do so was punishable by death.)

Egyptian royal cubit of Amentop I with storage box (replica) curtesy of The National Institute of Standards and Technology Digital Collections
As civilization advanced, people needed to be able to reproduce items like weapons, building materials, jewelry, or money. Each society defined its own standards of measurement for values like time, distance, length, and weight, but in the interests of international trade, countries met and agreed on common units of measurement and the standards they would be based on.
Look closely at historic documents and you’ll typically find some reference to weights and measurements. For example, the United States Constitution states “To coin money, regulate the value thereof, and of foreign Coin, and fix the standard of weights and measures.”
Today, most countries have National Measurement Institutes (NMIs) that are responsible for meeting the measurement needs of governments, industries and scientific organizations, and for coordinating measurement interoperability with other measurement institutes to help ensure fair global trade. Measurements are typically traceable to standards maintained within these institutes.
Measurements made by calibration instruments are ultimately traceable to one or more of the International System of Units (SI). There are seven base SI units and you can read more about them at our general page About Calibration.
What are the different types of calibrators?
There are many different types of calibrators which include:
Temperature calibrator
A temperature calibrator calibrates devices that measure temperature. Common devices or workload to be calibrated include:
- Thermometers
- Temperature probes
- Temperature transmitters
- Temperature sensors
- Platinum resistance thermometers (PRT or PT-100)
- Resistance-temperature detectors (RTD)
- Thermistors
- Thermocouples
The type of temperature calibration instrument selected for a particular calibration task depends on the type of sensor to be calibrated, the environment in which it is to be calibrated, and the required accuracy of the calibration.
Thermocouple calibrator
Thermocouples are sensors comprised of two wires made from different metals, connected to form a junction. Temperature is measured at the junction. There are many different types of thermocouples, with variations in the type of metal, temperature range, resistance, durability, and applications. They are commonly used in industry because they are inexpensive and cover a wide temperature range.
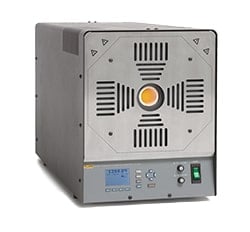
In many cases, thermocouples are calibrated in situ but in some cases, a thermocouple might need to be removed and placed in a precision temperature source like a dry-well.
To perform a calibration, the technician follows a procedure similar to this:
- Connect the thermocouple sensor to the calibrator or immerse it into a dry-well or bath.
- Adjust the calibrator’s temperature to each of the sensor’s test points.
- Record the temperature reading at each setpoint.
- Compare the measured voltage of the thermocouple sensor to that of the temperature calibrator.
- Repeat for each test point.
In addition to measuring thermocouple temperatures, a thermocouple calibration instrument might also be able to simulate temperature. This lets a technician verify if the thermocouple responds correctly to the temperature being sourced or supplied to it. Learn more about thermocouple calibrators.
Calibration bath
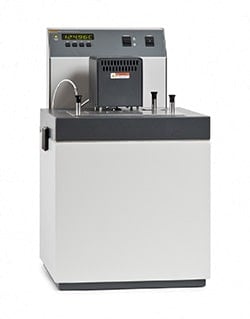
A temperature calibration bath is an enclosure filled with fluid that maintains a uniform, constant temperature for calibrating a wide variety of sensors that require immersion into a stable temperature source. Baths are typically very stable—that is, able to hold the same temperature over time - and have a relatively large working volume for calibrating multiple sensors at once.
A temperature bath typically includes:
- Container to hold the bath fluid. The size of the container can vary to accommodate different types of fluids and sensors.
- Baths may use a wide variety of fluids depending on the required temperature. Examples of fluids include water, ethyl alcohol, silicone oil, mineral oil, or bath salts.
- The temperature controller controls the bath’s temperature. It is important to understand the accuracy and temperature range of the bath and to match it with the right type of fluid.
- Various stands, rods, and clamps can be used to hold the probes being calibrated in the bath.
To perform a calibration using a temperature bath:
- Set the bath temperature and wait for it to reach that temperature and become stable (temperature stays the same over time).
- Insert the reference probe into the bath.
- Insert the probes to be calibrated (DUTs) into the bath. An advantage of a bath is that it can support different types and sizes of probes.
- Compare the measurements made by the reference probe with those made by the DUTs.
- Repeat these steps for each temperature that needs to be checked.
See how to calibrate probes with a calibration bath in this video.
ITS-90 fixed-point cell
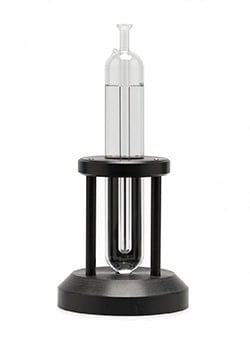
ITS-90 fixed-point cells are primary standards, also known as defining instruments of the ITS-90 (International Temperature Scale of 1990). Fixed-point cells are used to provide the highest temperature accuracy. They are used to calibrate standard platinum resistance thermometers (SPRTs).
ITS-90 fixed-point cells can be made of metal or quartz. Metal cells contain metals like mercury or copper, which maintain constant and intrinsic temperatures at freezing or melting points.
Triple point of water cells contain pure water and water vapor in a sealed quartz container. These cells achieve a temperature of 0.01 °C when their contents are in the “triple point” state where the water exists simultaneously as a liquid, a solid and a gas. Watch this video to see how the triple point of water is achieved.
Fixed-point cells perform calibrations by achieving a fixed temperature that is used as a very accurate reference to compare with the SPRT being tested.
To use a fixed-point cell:
- Bring the cell to its fixed-point temperature.
- Insert the thermometer to be tested.
- Record the measurement.
See how the triple point of water is achieved in this ITS-90 fixed point cell demonstration video.
Dry-block calibrator
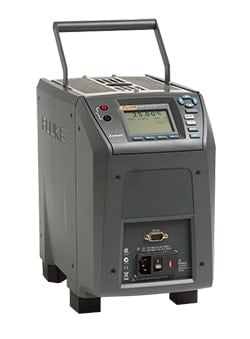
A dry-block, also known as a dry-well, calibrates temperature sensors like thermocouples, thermometers, thermistors, and RTDs in a liquid-free enclosure. Dry-blocks are used when the devices to be tested need both accuracy and portability.
A dry-block includes a container with a well for holding the devices under test. The well typically can accommodate a variety of removable inserts designed to hold the device(s). The dry block also includes a controller for setting and regulating the temperature in the well. Optionally it might also include a built-in reference thermometer.
To use a dry-block:
- Insert the correctly sized well insert into the dry-block’s well.
- Insert the reference thermometer (if it’s not built in or is desired for increased accuracy).
- Insert the DUTs into the well insert.
- Set the first temperature.
- Compare the temperature(s) measured by the DUTs to the temperature measured by the reference thermometer.
You may find the following 2 videos helpful:
- How to Calibrate a Digital Thermometer with a Dry-Block Calibrator and with Freezing and Boiling Water
- Introduction to Dry Block Calibrators
Infrared calibrator
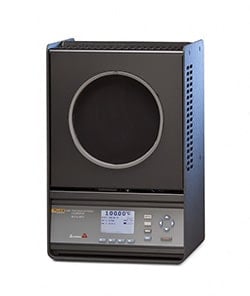
An infrared calibrator, sometimes referred to as an infrared blackbody, calibrates infrared thermometers, thermal imagers and pyrometers. It includes a flat black surface that emits and absorbs electromagnetic radiation focused on it from the DUT. It also includes a display to show the temperature measurement and other information such as emissivity setting and stability.
To use an infrared calibrator:
- ?Set the desired set-point temperature and wait until the unit reaches that temperature.
- Turn on the DUT and aim the beam toward the center of the heated blackbody surface.
- Record the measurement.
Pressure calibrator
A pressure calibrator calibrates devices that measure pressure. Common devices, or workload, that can be calibrated include:
- Analog and digital pressure gauges
- Digital test gauges
- Pressure transducers
- Barometers
- Relief valves
- Dial gauges
- Pressure switches
- Pressure sensors
- Pressure transmitters
- Downhole tools
- Relief valves
Pressure calibration instruments require a pressure supply, which typically comes from compressed gas (pneumatic) or compressed fluid (hydraulic). The pressure supply can be external (for example, it comes from a tank full of gas) or internal (such as a pump built into the instrument).
Piston gauge
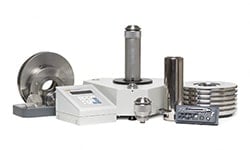
A piston gauge is also referred to as a pressure balance or a deadweight gauge. Workload (or things that can be calibrated) for this type of calibration instrument includes:
- Pressure controllers
- Deadweight testers
- Other piston gauges
- Portable and handheld pressure standards
- High accuracy barometers
- Air data test sets
A piston gauge typically includes:
- A piston-cylinder and platform
- Calibrated masses (weights) to mount on the piston
- Controller to set and adjust pressure
- Bell jar cover (in some cases)
- Various accessories (O-rings, valves, etc.)
- External pressure source
A piston gauge operates by balancing pressure from a weight mass, subjected to acceleration due to gravity, against a vertically mounted piston rotating in a cylinder. A technician loads a specific weight (mass) onto the piston, applies pressure to raise the piston above the piston gauge housing until it’s “floating” and rotates the piston. When the force applied by the pressure and the force applied by the mass are in equilibrium, the piston “floats”. At this point, the piston gauge is ready to make a measurement.
Deadweight tester
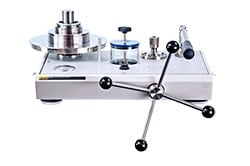
A deadweight tester uses calibrated weights (masses) to apply pressure to a device under test (DUT) so that its pressure can be measured.
Deadweight testers calibrate a wide variety of pressure gauges and sensors. Parts of a deadweight tester typically include:
- Piston cylinder and platform
- Calibrated masses (weights)
- A reservoir for holding the pressure source (gas or liquid)
- A pump to generate and adjust the pressure
To perform a calibration with a deadweight tester:
- Set the mass (weight) on the piston.
- Increase the pressure under the piston until it floats while being rotated.
Determine the reference pressure from the calibrator due to the environmental data and calibration data. - When the pressure stabilizes, take the measurement.
See how to measure pressure with a deadweight tester in this demonstration video.
Pressure controller/calibrator
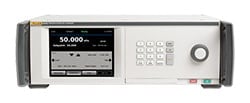
A pressure controller/calibrator measures and controls the pressure in a test system. Most modern controllers reach stable pressure quickly and can cover a wide range of pressures. They are so accurate they can even replace piston gauges in some applications.
Pressure controllers calibrate workload (devices under test - DUTs) that includes:
- Digital test gauges
- Pressure transmitters
- Pressure transducers
- Dial gauges
- Pressure switches
- Portable calibrators
- Barometers
- Downhole tools
Many pressure controllers can be automated with calibration software and support remote communication through RS-232, GPIB, USB, and/or Ethernet ports. They can sometimes be rack-mounted. These features make them popular in manufacturing applications.
A pressure controller typically includes:
- Devices to measure and control pressure
- Display
- Keys and/or dials to enter and adjust data
- Port to which pressure can be applied
To use a pressure controller:
- Connect it to a pressure supply.
- Connect the DUT to a test port.
- Use the instrument’s controls to adjust the pressure.
- Take and record the measurement.
- Move to the next test point and repeat the process.
See the benefits of a modular pressure controller in this video.
Pressure comparator
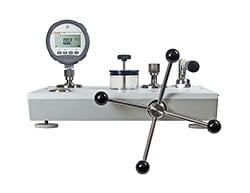
A pressure comparator supplies a precisely controlled pressure to both a reference gauge and DUT. Pressure comparators include mechanical components that generate and fine-tune pressure measurements. A comparator also includes a test port for a reference gauge and a second port for the DUT. A hydraulic comparator includes a fluid reservoir and a screw press for generating the pressure. A pneumatic comparator includes a pump for generating the pressure and a vent valve for releasing the pressure.
Pressure comparators calibrate devices or workload that includes:
- Dial gauges
- Pressure transmitters
- Pressure switches
- Relief valves
To use a pressure comparator:
- Connect the reference gauge and the DUT.
- Use a pump to apply pressure.
- Use a screw press to adjust the pressure.
- Take and record the measurement.
- Move to the next test point and repeat the process.
Portable handheld pressure calibrator
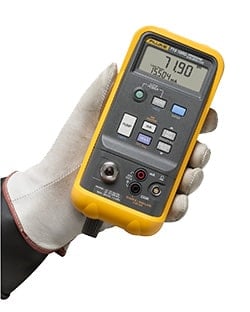
A portable handheld pressure calibrator is typically small enough to hold in one hand, and it is often rugged enough to use in industrial environments. They are typically less accurate than bench pressure calibrators like those discussed above.
Portable pressure calibrators calibrate:
- Dial gauges
- Pressure transmitters
- Pressure switches
- Relief valves
A portable pressure calibrator typically consists of a display, ports for connecting test leads, and buttons to set and adjust the pressure parameters. As with all pressure calibrators, a pressure source is also required. This could be an external source or a built-in pump. These devices are often used in industrial environments and might be battery-powered, lightweight, and include a sturdy case.
To perform a test with a portable pressure calibrator:
- Connect the instrument to the device under test (DUT).
- Apply pressure to the DUT.
- Record the measurement displayed on the instrument.
- Move to the next test point and repeat the process.
Air data calibrator
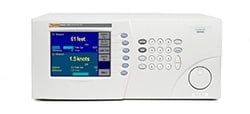
Air data calibrators calibrate avionics instrumentations such as:
- Altimeters
- Airspeed indicators
- Rate of climb meters
- Mach meters
- Air data computers
- Engine-based control systems
These instruments typically include keys and/or a dial and a display for setting and viewing pressures, plus electronics for measuring and controlling pressure. It might also include connectors for automating the calibration with calibration software.
To use an air data calibrator:
- Set the appropriate unit of pressure.
- Set the instrument to control the pressure.
- When pressure is stabilized, set the instrument to make a measurement.
- Make and record the measurement.
- Move to the next test point and repeat the process.
Electrical calibrator
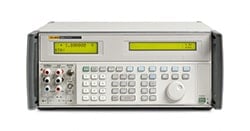
An electrical or electronic calibrator calibrates electronic instruments. Electronic instruments typically measure some combination of voltage, current, resistance, inductance, capacitance, time and frequency. They might also include electrical power and phase.
An electrical calibrator typically provides output signals that are read by the DUT. It might also make precision measurements.
Typical instruments or workload that can be calibrated by an electrical calibrator includes:
- Digital multimeters
- Current clamps and clamp meters
- Thermocouples and RTDs
- Process calibrators
- Data loggers
- Strip and chart recorders
- Wattmeters
- Power harmonics analyzers
- Panel meters
- Graphical multimeters
Some calibration instruments can be purchased with options to handle additional workload like oscilloscopes and power quality analyzers.
An electrical calibrator typically includes input and output ports, keys and/or a dial to input parameters and make menu selections, and a display. It might include connectors for remote or automated operation. Some of these instruments can be partially or fully automated with software.
To use an electrical calibrator:
- Connect the instrument to the device under test (DUT).
- Set the DUT to the appropriate parameter (for example, 10 volts dc).
- Set the instrument to output the appropriate source for that parameter.
- Press a Start or Enter key on the instrument to begin the test.
- Record the result.
Many electrical calibrators are laboratory instruments that sit on a bench and plug into a wall. For fieldwork, portable electrical or current instruments can be used, although they are typically not as accurate as the bench instruments.
See a brief overview of the Fluke 5522A Multi-Product Electrical Calibrator in this 1-minute video.
RF calibrator
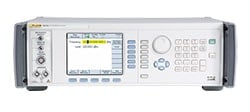
A radio frequency, or RF, calibrator calibrates radio frequency in instruments such as:
- Spectrum analyzers
- RF power sensors
- Modulation meters and analyzers
- Measurement receivers
- Frequency counters
- RF attenuators and components
- High-frequency oscilloscopes
RF calibration can be complex because of the number of tests required to calibrate this type of workload. Therefore, a system comprised of multiple instruments is typically required. Instruments found in a typical RF calibration system include:
- Signal generators
- Level generator
- Function generator
- Power meters
- Measuring receiver
- Spectrum analyzer
- RF and microwave counters
- Network analyzer
- Audio analyzer
- Oscilloscope
- Digital multimeter
These instruments might be individual pieces of equipment; however, in some cases, the functionality of multiple instruments might be combined in a single calibration instrument. Consolidating functions helps to reduce the possibility of error.
To use an RF calibrator, you connect it to the DUT and generate a series of signals such as RF output, leveled sine, modulated output, sweep output, frequency, power and more. Choosing the right kinds of cables is important to avoid excessive attenuation (reduction of the signal) and other unwanted effects. You might need to apply RF correction factors to account for measurement issues such as adapter insertion loss or splitter tracking errors.
See how to use an RF reference source to calibrate a spectrum analyzer in this video.
Humidity Calibrator
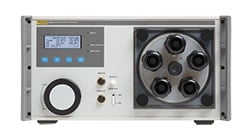
A humidity calibrator generates humidity to test sensors such as humidity probes that make critical measurements to protect against spoilage in industries such as pharmaceuticals, medical devices, semiconductors, chemicals, and food production.
A humidity calibrator typically includes:
- Chamber for holding the device under test (DUT)
- Display to show temperature and humidity setpoints and actual measurements
- Mixing insert to circulate air for temperature and humidity uniformity
- Container for holding water
- Desiccant cartridge to provide a source of low humidity
To use a humidity calibrator, follow these general steps:
- Fill the designated container with distilled water.
- Place the DUT(s) into the calibration chamber.
- Set temperature and humidity.
- Make sure the temperature and humidity are stable.
- Make and record the measurements.
- Do lower-relative humidity calibrations first and ramp up to the higher-humidity levels on each subsequent step.
See a product demonstration of the Fluke 5128A Humidity Generator in this video.
Flow calibrator
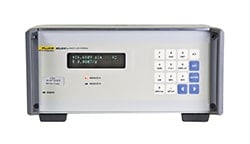
A flow calibrator calibrates devices that sense and control flow. Typical devices under test (DUTs) include flow meters and flow controllers used in process control applications, environmental quality/monitoring, medical/breathing systems, leak testing, and National Measurement Institutes.
These instruments may test gas flow or liquid flow. When testing liquid flow, the liquid can remain in an open container, but when testing gas flow, the gas must be contained.
A flow calibrator typically includes:
- A user interface comprised of a display and keypad
- Flow elements that make the actual flow measurements
- Various connectors
To use a flow calibrator:
- Make a leak-free plumbing connection between the DUT and the instrument.
- Pass the gas or liquid media through both devices, maintaining a steady-state flow.
- Compare the outputs of the instrument and the DUT over the same time period.
Some flow calibration instruments can be automated with calibration software. Automation enables you to take multiple readings at the same time from both the DUT and the instrument.
See a demonstration of the a Fluke gas flow calibration system in this video.
Process calibrator
The term “process calibrator” refers to a category of instruments used in process industries. A process industry is one that produces a product using ingredients in a batch, rather than manufactured with parts as an individual product. Examples of process industries include food and beverage, chemicals, pharmaceuticals, and petroleum.
You can think of process calibrators as special subsets of other types of instruments, such as pressure, temperature or flow calibrators. Examples of process calibrators include:
- Milliamp (mA) loop calibrators. This category of tools might perform calibrations, troubleshoot control valves, or both.
- Documenting process calibrators. As the name implies, these tools perform calibrations and also document the results. This category of instrument typically sources and measures a wide variety of parameters that could include volts, frequency, ohms, thermocouples, and more.
- Handheld temperature calibrators. As the name states, these are handheld tools that source and measure temperature. They typically simulate outputs from temperature sensors and are used with a reference probe whose measurements are compared with those of the sensor under test. Learn more at our Temperature Calibrator page.
- Multifunction process calibrators. These instruments are designed for process professionals who work with a varied workload and need to calibrate various test and measurement instruments, so they require a wide variety of sourcing and measurement capabilities.
- Pressure gauge calibrators. This type of instrument typically includes a reference pressure gauge that is used as a reference to compare against the gauge being tested.
Process Calibrators
Left to right & top to botton: loop, process documenting, temperature, multifunction, and gauge
Who uses calibrators?
Calibration professionals are people who care about making accurate measurements and maintaining measurement quality to one degree or another. A variety of different job titles could be considered for people who perform calibrations.
Metrologist
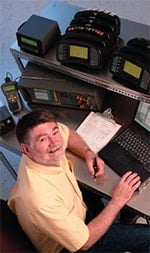
Metrologists work in measurement science. A metrologist’s responsibilities might include:
- Maintaining traceability of his company’s instruments, measurements, and calibrations
- Maintaining calibration laboratory accreditation
- Developing and evaluating calibration systems
- Identifying and quantifying error sources that contribute to the uncertainty of results, to determine the reliability of measurement processes
- Redesigning or adjusting measurement capabilities to minimize errors
- Developing calibration methods
- Directing engineering, quality and laboratory personnel in measurement standards
You might find a metrologist in a calibration laboratory in a manufacturing company, or in a third-party calibration lab that specializes in performing calibrations on behalf of others. Governments typically have calibration laboratories staffed with metrologists.
Calibration engineer
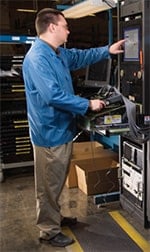
This field of engineering supports activities like these:
- Analyzing inspection, measuring, and test equipment to determine the calibration requirements
- Determining the functions to be tested and their specifications, the methods to be used, and the measurement standards required
- Preparing and testing new calibration procedures.
- Setting appropriate calibration intervals to meet corporate reliability goals
Calibration engineers often work in calibration laboratories or calibration services companies, but you might also find them in process industries, labs or on the factory floor.
Calibration technician
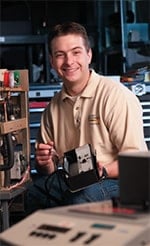
A calibration technician performs tasks like these:
- Tests, calibrates and repairs instruments and equipment for conformance to standards
- Assists in formulating calibration standards
- Uses documentation to plan calibration procedures and determine the required equipment
- Sets up laboratory equipment to test, evaluate and calibrate other instruments and test equipment
- Disassembles instruments and inspects components for defects
- Aligns, repairs, replaces component parts and circuitry
- Assists engineers in formulating test, calibration, repair and plans to maintain the accuracy of instruments and equipment
Calibration technicians work in calibration labs, including third-party labs, large in-house labs and I&E shops.
Laboratory manager

A calibration laboratory manager typically performs these tasks:
- Supervises laboratory technicians
- May function as a metrologist in addition to being a business manager
- Works in an office but can go out to the field if needed
- Reviews data for consistency and acts as a dispatcher tech when a need for reactive maintenance is identified
- Responsible for lab throughput, turnaround time and on-time delivery
Lab managers work in calibration laboratories, including third-party labs, large in-house labs, I&D shops, and government labs.
Manufacturing engineer
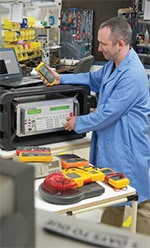
A manufacturing engineer performs:
- Production related activities, such as setting up and maintaining a production cell and equipment
- Preventive maintenance
- Troubleshooting performance and quality issues
- Equipment repair
- Calibration
- Software development
- Safety-related activities
Manufacturing engineers work for small, medium or large manufacturers.
Instrument technician
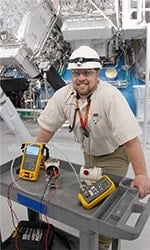
An instrument tech’s responsibilities might include
- Installing, calibrating or maintaining instrumentation for a facility or region
- Completing the jobs assigned to him by the maintenance manager or instrumentation lead at larger companies
- Might also be an electrician
Instrument technicians typically work at large process companies (mills, pharmaceuticals, oil and gas, chemical processing)
?
Alternate titles for calibration professionals
Calibration professionals are known by a wide variety of titles. Here are some examples in addition to those above:
- Repair technician
- Service manager
- Business owner
- Quality assurance manager
- Test engineer
- Process engineer
- Quality assurance
- Manufacturing supervisor
- Instrumentation engineer
- Quality Assurance (QA)/Quality Control (QC) manager
- I&E technician
- E&C technician
- Instrumentation technician
- E&I technician
How often should a calibrator be used?
Another way to ask this question is, how often should you calibrate? The answer depends on the nature of your workload (the types of things you calibrate and how often), the quality standards you comply with, your requirements for accuracy, and your specific applications. Most of the instruments you calibrate will have calibration intervals recommended by their manufacturers. You might also decide to perform calibrations in a regular cadence, such as annually or biannually. If you frequently make critical measurements, you might want to calibrate even more often – even monthly.
Other factors that might influence how often you calibrate:
- Your organization is implementing a critical measuring project, such as taking a plant down for testing. If you work in an industry such as pharmaceutical, regulations might require you to calibrate before and after the project. Similarly, if your organization requires highly accurate measurements, you want to ensure that your measurement standards remain in tolerance.
- An instrument is impacted in some way that might affect its performance. For example, if an instrument is dropped, you might want to calibrate it to make sure it remains in good working order.
Of course, you will need to calibrate your equipment periodically, and that may mean taking it out of service while the calibration is being done. If calibrating a calibrator, in some cases, a modular type of calibrator could remain in service because you can swap out and calibrate the modules.
How do you automate calibrators?
Performing calibrations manually can be time consuming and also carries the possibility of user error. Automating the process can improve throughput significantly while also ensuring that the calibrations are performed consistently and without error.
Calibrators are typically automated with software. The calibration software includes a series of step-by-step commands, called procedures that tell the instrument what signals to output throughout the test. The procedure might also include illustrations that show a technician how to connect the instrument to the device under test (DUT). If a calibrator can be automated completely, the technician just connects it to a DUT, runs the appropriate procedure, and walks away to perform other tasks.
When should you upgrade an old calibrator?
For many calibration professionals, a calibrator just keeps getting better over the years. That’s because over time the lab learns how the instrument behaves, so there is a general understanding, plus recorded data, of the instrument’s drift rate, accuracy, and so forth.
However, no one wants to risk the downtime that results when a calibrator stops working. Careful planning is necessary to make decisions about the best time and/or reasons to replace an old calibration instrument.
In planning for a replacement purchase, you’ll want to understand how the old one is being used and what the risks are if it malfunctions. Mission-critical equipment should be replaced before a downtime situation occurs.
Here are some reasons you might want to replace an old calibrator:
- It’s obsolete or end-of-service, meaning the manufacturer no longer supports it
- It’s broken or damaged, and repairs are expensive or not possible
- Your workload has grown and/or changed and you need better capability
- You want to take advantage of features in newer calibration instruments
- You want an instrument that is easier for new technicians to learn to use
- You are offered a good deal on a new instrument, such as a trade-in program
For more information on the benefits of upgrading an old calibrator see this blog post: How End-of-Life Calibrators Can Help You Upgrade to the Newest Technology and Reduce Production Risks.
What is the price range of calibrators?
Calibrators are available in a wide variety of prices, from under $1,000 to over $100,000. Cost is driven by how much it costs to manufacture the calibrator, as well as how much it cost to design it. Lab quality, highly accurate instruments typically cost more than less accurate handheld instruments. The task of the calibration customer is to determine how much accuracy is required, and then how much to pay for additional features that make the instrument easy to learn, safe, and productive to use.
Summary
On this webpage, we have provided some basic information about calibrators, including:
- Formal and informal definitions of a calibrator
- Calibrator synonyms
- How a calibrator is used
- Why calibration is important
- A brief history of calibration
- Summary listing and descriptions of various types of calibration equipment
- Information about who uses calibration equipment and how often they use it
- How to automate a calibrator
- When to upgrade an old calibration instrument
- Calibrator price ranges
Fluke is proud to be a quality calibrator manufacturer. If you would like help selecting a calibrator, speak with one of our calibration instrument experts.
Keep learning
- Why is Calibration Important?
- About Calibration
- Calibration Standards
- Training Courses
- The Fluke Calibration Education Hub
Not subscribed yet? Join the Fluke Calibration email list – see the benefits and subscribe here.
Related products
Get help
- Customer & technical support
- Speak with a calibration product expert about your equipment needs
